Thursday, June 9, 2016

DONE !!!!

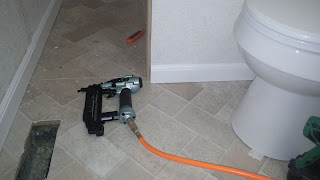
Finally .... the bathroom is done... 


the next part is to do the laundry room.... but that it's not going to take too much time to complete... I already have installed the subfloor, drywall, sheetrock mud and the access panel to the water line for the shower, 

Tuesday, June 7, 2016

Please post any comments, suggestions, etc...

Thank you to those who were helping and encouraging me along the way ...   

Almost there....just a little push...

Skimmed the floor joints ...


Now it will be an access panel to the water connections for the shower...


An a day later, the new floor is in.. 


Matching textured wallpaper is installed.


Mold resistant base boards are installed along with silicone sealing. Toilet and vanity are installed... 


and God willing... tonight the bathroom will be completed, done, finish, finito...

and actual repairs started .... FINALLY !!!!!

New sub-floor boards are installed on the bathroom and laundry room. Constructed wall box is in place.


A bathtub for the size that would fit was not readily available due to primarily size, then time and $$$. So instead of "loosing" the full bathroom, we decided to install a shower and again... size matters ... a lot... more than 32 inches will overlap with toilet and it was a little challenge to find a shower that would fit and trying to keep the $ in check ....

a new "wall" had to be constructed... and so it begins..


New mold resistant drywall is in...


Sprayed with expanding foam under in between the shower floor and the sub-floor. 


and the last piece of sub-floor is going out....


and its gets worse .....

And to find the leak that apparently was coming from the bath tub connections, I had to remove the tub, BUT...  the bathroom and bathroom walls were constructed "around" the 1-piece tub, and the tub could not be removed easily or moved to check for the connections.... Sooooo...it have to come out in pieces.....   5 to be exact...  and the best part.... 
Also, the handles on the faucet and controller mixer were started to failed and dripping water constantly unless it was tighten ultra hard. 


Cutting the sub-floor boards started on the bathroom

Access panel on the other side of the wall for the shower was non-existent. So I had to create one... and upon removing the wall... mold... lots of it of both wall from the bathroom and from the laundry room


 Upon inspection on the laundry room floor... lifting the linoleum revealed a worse water damage on the laundry room floor..  so, that floor would also have to come out as well...

The good thing is that those studs on the wall between the bathroom and the laundry room is a NON load bearing wall and cut those studs to remove the rotting ends and it will be replaced with a "box" of studs and attached in place.


Not so much for a quick weekend remodel project anymore...

And... the taking things apart tasks begin....  first, the vanity bowl and vanity...


removed and linoleum on the vanity side and so far so good...


Getting closer to the toilet and I started seeing the water damage


Removed the toilet and the whole linoleum and here it "looked" like the source of the leak is coming from the bath tub/shower connection... 


Forced Renovation on 2nd bathroom

This  is how the bathroom looked before I have to tear it apart.


\


For what it can be "seen", my original thought was the source from the toilet sinking was a failed wax ring seal between the toilet and the drain.


As it can be seen on this pict, the sinking was very steep and the toilet brush bowl is more inclined than the Pisa tower...  
Also, a separation between the base board and the floor can be appreciated on this picture.